주의 : 해당 글은 공부 글이니 정확한 정보가 아닐 수도 있습니다. 주의해주세요.
1편에서 이어집니다.
1편 링크 : https://youseong.me/auth/skillboard/details/64
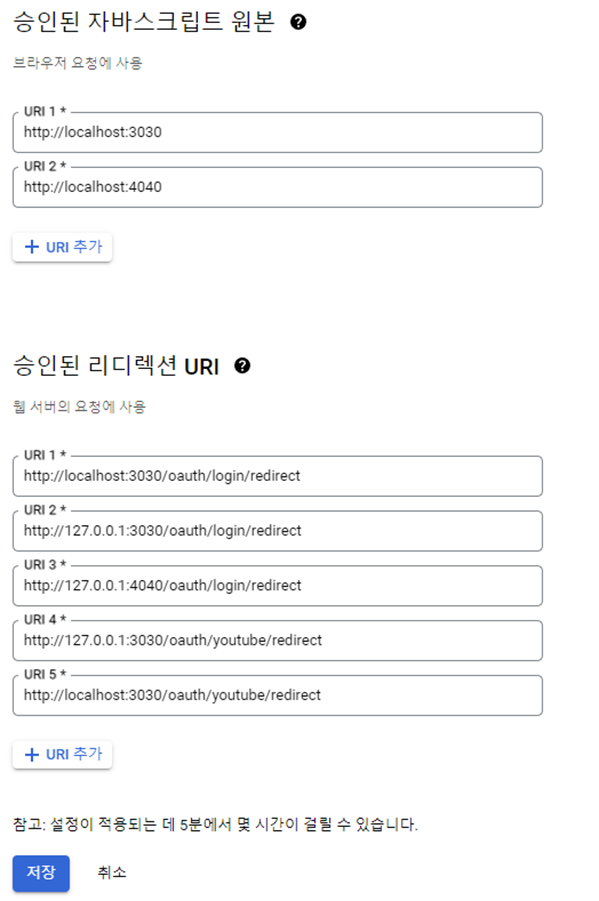
해당 리디렉션 URI를 통해서 진행합니다.
컨트롤 단에 먼저 클라이언트가 http:localhost:3030/youtube-check
라는 요청 시
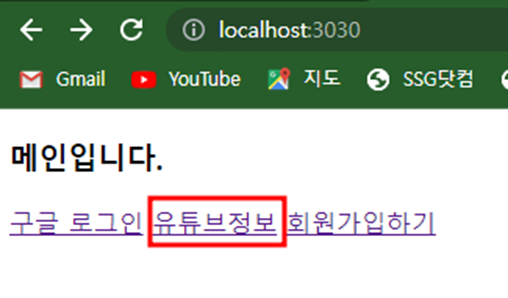

@GetMapping(value = "/youtube-check")
public ResponseEntity youtubeCheck(){
String authUrl = "https://accounts.google.com/o/oauth2/v2/auth?"
+
"scope=profile%20email%20openid%20https://www.googleapis.com/auth/youtube.readonly"
+
"&client_id="+CLIENT_ID+
"&redirect_uri="+clientredirectyoutube+
"&response_type=code&mine=true";
URI redirectUri = null;
try {
redirectUri = new URI(authUrl);
HttpHeaders httpHeaders = new HttpHeaders();
httpHeaders.setLocation(redirectUri);
log.info("check login");
return new ResponseEntity<>(httpHeaders, HttpStatus.SEE_OTHER);
} catch (URISyntaxException e) {
e.printStackTrace();
}
return ResponseEntity.badRequest().build();
}
Client ID 와 Client Redirection을
담아 youtube 인증 요청을 먼저 시도합니다.
@GetMapping(value = "/oauth/youtube/redirect")
public ResponseEntity<ChannelListResponse> redirectGoogleYoutube(
@RequestParam(value = "code") String authCode
) {
RestTemplate restTemplate = new RestTemplate();
GoogleLoginRequest requestParams = GoogleLoginRequest.builder()
.clientId(configUtils.getClientid())
.clientSecret(configUtils.getClientsecret())
.code(authCode)
.redirectUri(configUtils.getClientredirectyoutube())
.grantType("authorization_code")
.build();
try {
HttpHeaders headers = new HttpHeaders();
headers.setContentType(MediaType.APPLICATION_JSON);
HttpEntity<GoogleLoginRequest> httpRequestEntity = new HttpEntity<>(requestParams, headers);
ResponseEntity<String> apiResponseJson = restTemplate.postForEntity(configUtils.getAuthurl() + "/token", httpRequestEntity, String.class);
ObjectMapper objectMapper = new ObjectMapper();
objectMapper.setPropertyNamingStrategy(PropertyNamingStrategy.SNAKE_CASE);
objectMapper.setSerializationInclusion(JsonInclude.Include.NON_NULL); // NULL이 아닌 값만 응답받기(NULL인
경우는 생략)
GoogleLoginResponse googleLoginResponse = objectMapper.readValue(apiResponseJson.getBody(), new TypeReference<GoogleLoginResponse>() {});
String jwtToken = googleLoginResponse.getIdToken();
String accessToken = googleLoginResponse.getAccessToken();
YouTube youTube = apiExample.getYouTubeService(accessToken);
YouTube.Channels.List request = youTube.channels().list(Collections.singletonList("snippet,contentDetails,statistics"));
ChannelListResponse response = request.setMine(true).execute();
System.out.println("결과값");
System.out.println(response);
System.out.println(response.toString());
ObjectMapper mapper = new ObjectMapper();
mapper.setSerializationInclusion(JsonInclude.Include.NON_NULL); // NULL이 아닌 값만 응답받기(NULL인
경우는 생략)
YoutubeChannelList channelList = mapper.readValue(response.toString(), YoutubeChannelList.class);
if(channelList.getItems().size() >0){
System.out.println("원하는 값 id : "+ channelList.getItems().get(0).getId());
}
String requestUrl = UriComponentsBuilder.fromHttpUrl(configUtils.googleInitYoutubeUrl() + "/tokeninfo").queryParam("id_token", jwtToken).toUriString();
String resultJson = restTemplate.getForObject(requestUrl, String.class);
if(resultJson != null) {
return ResponseEntity.ok().body(response);
}
else {
throw new Exception("Google OAuth failed!");
}
}
catch (Exception e) {
e.printStackTrace();
}
return ResponseEntity.badRequest().body(null);
}
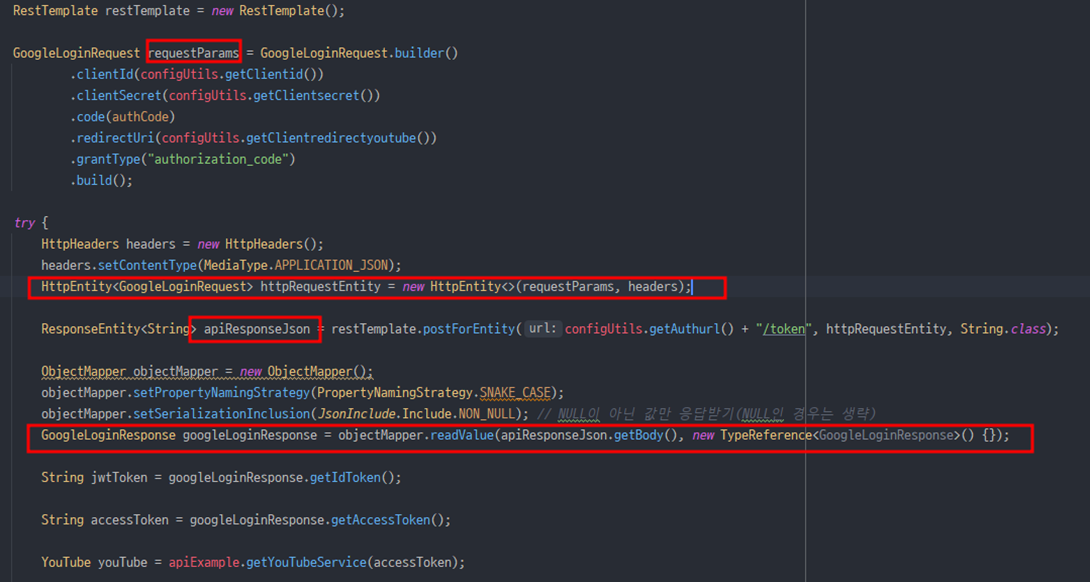
전체적인 과정은 이렇습니다.
1.
로그인 성공 후 http://localhost:3030/oauth/youtube/redirect
로 Redirect 해줍니다.
2.
로그인 완료 시 code를 부여 받는데 해당코드로
다시한번 RestTemplate를 통해서 AccessToken을
부여받을 수 있는 URl을 요청합니다. (https://oauth2.googlepais.com.token에
Body값을 담아서 보내줍니다.)
3.
AccessToken이 담긴 올바른 json결과값을 ObjectMapper를 통해서 미리 만들어 둔 객체에
매핑해줍니다.
4.
AccessToken를 이용해서 google V3 API를 사용합니다.
GoogleLoginResponse 객체는
import lombok.*;
@Data
@AllArgsConstructor
@NoArgsConstructor
@Builder
public class GoogleLoginResponse {
private String accessToken; // 애플리케이션이 Google API 요청을 승인하기 위해 보내는
토큰
private String expiresIn;
// Access Token의 남은 수명
private String refreshToken;
// 새 액세스 토큰을 얻는 데 사용할 수 있는 토큰
private String scope;
private String tokenType;
// 반환된 토큰 유형(Bearer 고정)
private String idToken;
}
이렇게 짜여있습니다.
필드 값은 이름 그대로 사용했기 때문에 그대로 준비해서 사용해주시면 됩니다.
@RequiredArgsConstructor
@Log4j2
@Component
public class ApiExample {
@Value("${mygoogle.apiKey}")
private String apiKey;
@Value("${mygoogle.clientid}")
private String clientid;
@Value("${mygoogle.clientsecret}")
private String clientsecret;
@Value("${mygoogle.clientredirect}")
private String redirecturl;
private static final Collection<String> SCOPES =
Arrays.asList("https://www.googleapis.com/auth/youtube.readonly",
"https://www.googleapis.com/auth/userinfo.profile",
"https://www.googleapis.com/auth/userinfo.email");
private static final String APPLICATION_NAME = "웹 클라이언트 1";
private static final JsonFactory JSON_FACTORY = JacksonFactory.getDefaultInstance();
private final String client = "{\n" +
"
\"installed\": {\n" +
"
\"client_id\": \""+clientid+"\",\n" +
"
\"client_secret\": \""+clientsecret+"\",\n" +
"
\"redirect_uri\": \""+redirecturl+"\"\n" +
"}\n" +
"}";
/**
* Create an authorized Credential
object.
*
* @return an authorized Credential object.
* @throws IOException
*/
public Credential authorize(final NetHttpTransport httpTransport) throws IOException {
// Load client secrets.
InputStream in = ApiExample.class.getResourceAsStream(client);
GoogleClientSecrets clientSecrets =
GoogleClientSecrets.load(JSON_FACTORY, new InputStreamReader(in));
// Build flow and trigger user
authorization request.
GoogleAuthorizationCodeFlow flow =
new GoogleAuthorizationCodeFlow.Builder(httpTransport, JSON_FACTORY, clientSecrets, SCOPES)
.build();
LocalServerReceiver receiver = new LocalServerReceiver.Builder()
.setPort(4040)
.build();
Credential credential =
new AuthorizationCodeInstalledApp(flow, receiver).authorize("user");
return credential;
}
/**
* Build and return an authorized API
client service.
*
* @return an authorized API client service
* @throws GeneralSecurityException, IOException
*/
public YouTube getService() throws GeneralSecurityException, IOException {
final NetHttpTransport httpTransport = GoogleNetHttpTransport.newTrustedTransport();
Credential credential = authorize(httpTransport);
return new YouTube.Builder(httpTransport, JSON_FACTORY, credential)
.setApplicationName(APPLICATION_NAME)
.build();
}
public YouTube getYouTubeService(String accessToken) throws GeneralSecurityException, IOException {
HttpTransport httpTransport = GoogleNetHttpTransport.newTrustedTransport();
// 자료 맞춘거
InputStream inputStream = new ByteArrayInputStream(client.getBytes());
GoogleClientSecrets clientSecrets = GoogleClientSecrets
.load(JSON_FACTORY, new InputStreamReader(inputStream));
// Flow
GoogleAuthorizationCodeFlow flow = new GoogleAuthorizationCodeFlow.Builder(httpTransport, JSON_FACTORY, clientSecrets, SCOPES)
.build();
// Use the access token to create the
credential object
TokenResponse response = new TokenResponse();
// accessToken 반드시 필요
response.setAccessToken(accessToken);
Credential credential = flow.createAndStoreCredential(response, null);
// Build and return the YouTube object
return new YouTube.Builder(httpTransport, JSON_FACTORY, credential)
.setGoogleClientRequestInitializer(new YouTubeRequestInitializer(apiKey))
.setApplicationName(APPLICATION_NAME)
.build();
}
}
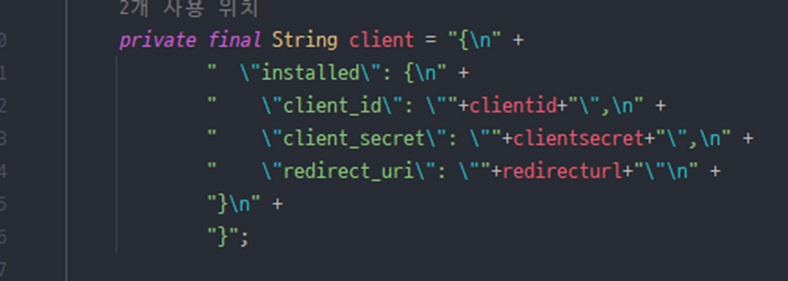
참고로 테스트해보는 사이트에서 client가 어떤 내용이 담겨야 하는지
설명이 나와있지 않아서 이렇게 따로 문서를 보면서 찾아냈습니다.
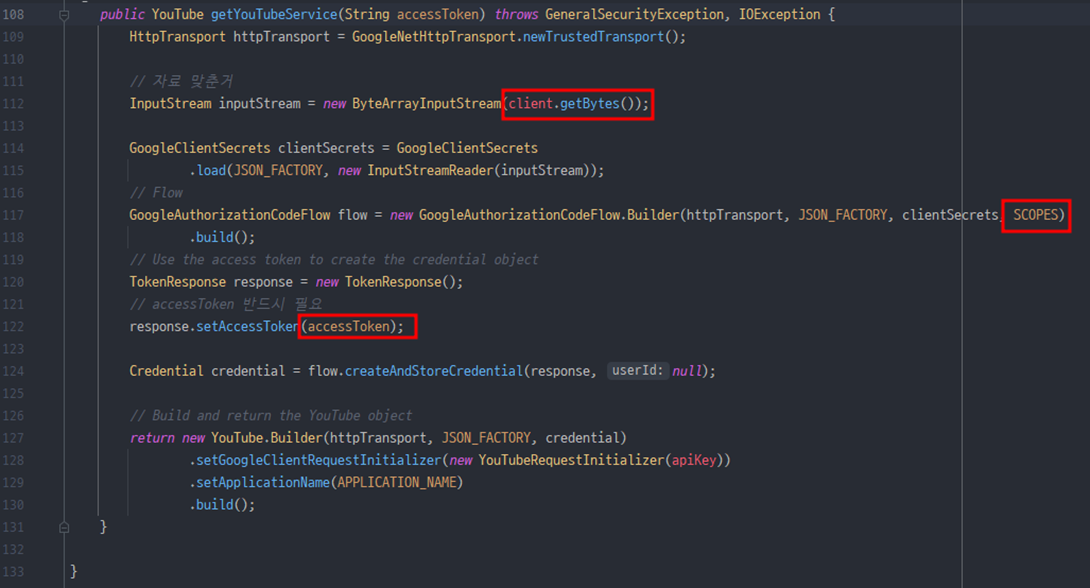
해당 코드를 통해서 API를 요청할 수 있습니다.
1.
아까 캡처해 놓았던 client를 참고해 InputStream자료형으로 담아줍니다.
2.
CodeFlow를 통해서 올바른 Credential을 받아올 수 있습니다.
3.
그리고 아까 로그인 완료와 token요청을 통해
받아 둔 accessToken을 response에 담아줍니다.
4.
중요한점은 128줄을 보시면 apiKey가 필요하다는 걸 알 수 있습니다. 발급 받아 둔 걸 사용해
줍니다.
필요한 요소가 모두 갖춰졌다면 올바르게 YouTube 자료형이 반환
됩니다.
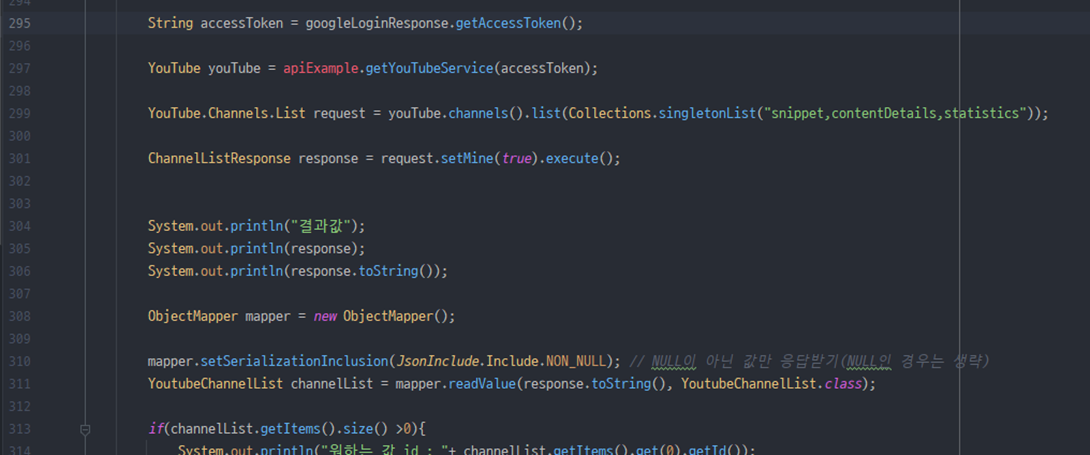
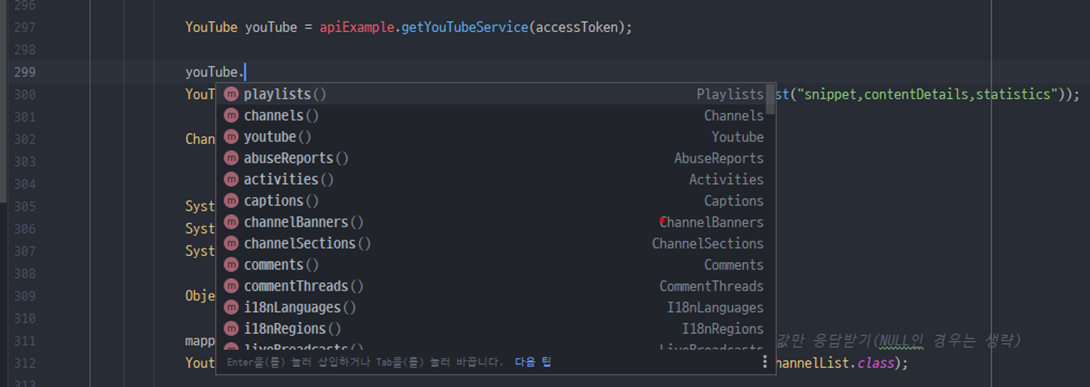
이제 다시 Controller에 와서 올바르게, 에러가 없이 YouTube 객체를 받아와 졌다면 이제 자유롭게 요청하면
됩니다.
저는 전 게시글에서 말한 것처럼 로그인 유저의 채널 정보를 받아오고 싶기 때문에 위 코드처럼 작성하면됩니다.
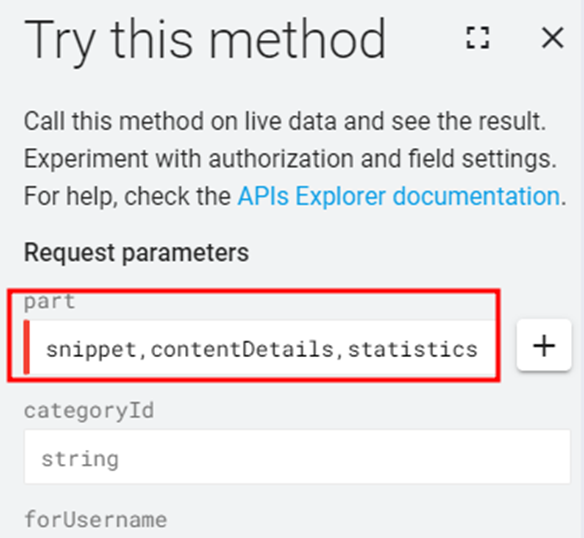
(위 코드가 이제 해당 UI 였다는
걸 알 수 있습니다.)
결과
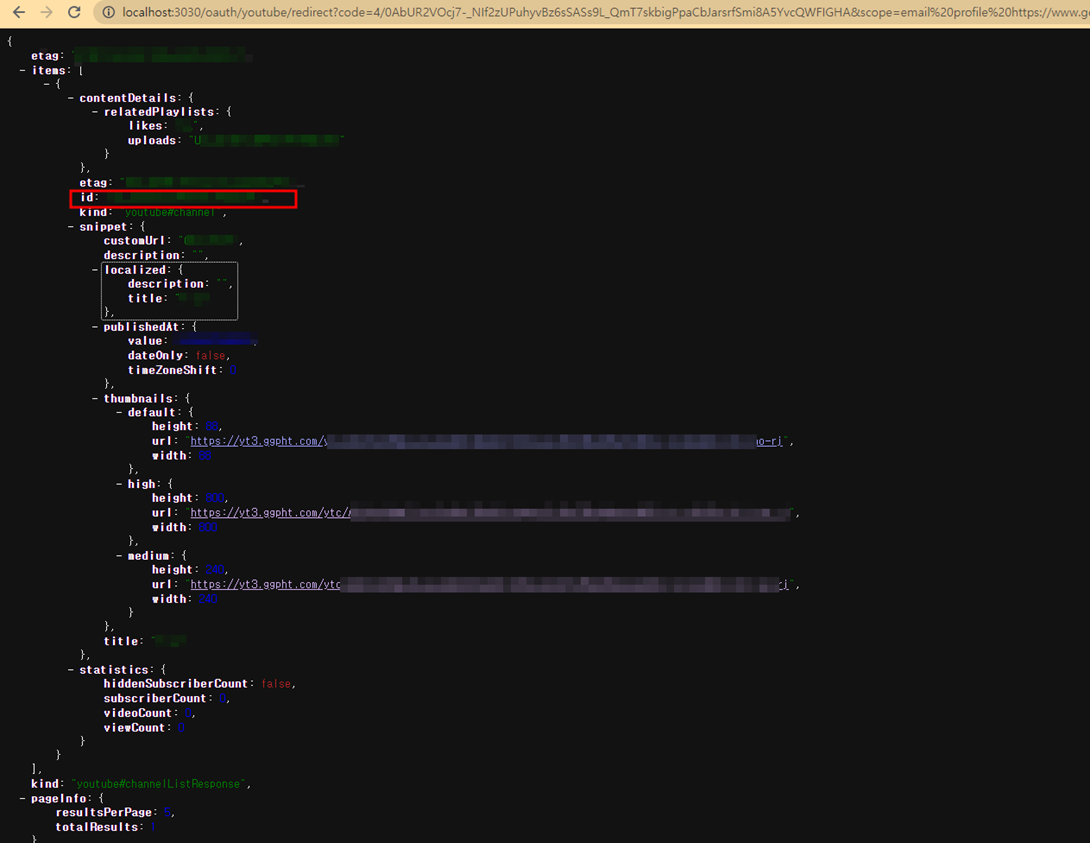
이렇게 ID값이 잘 받아온 걸 알 수 있습니다.
API V3 라이브러리를 가져오면 다양한 API들을 요청할 수 있는 걸 알 수 있습니다.
긴 글 봐주셔서 감사합니다!